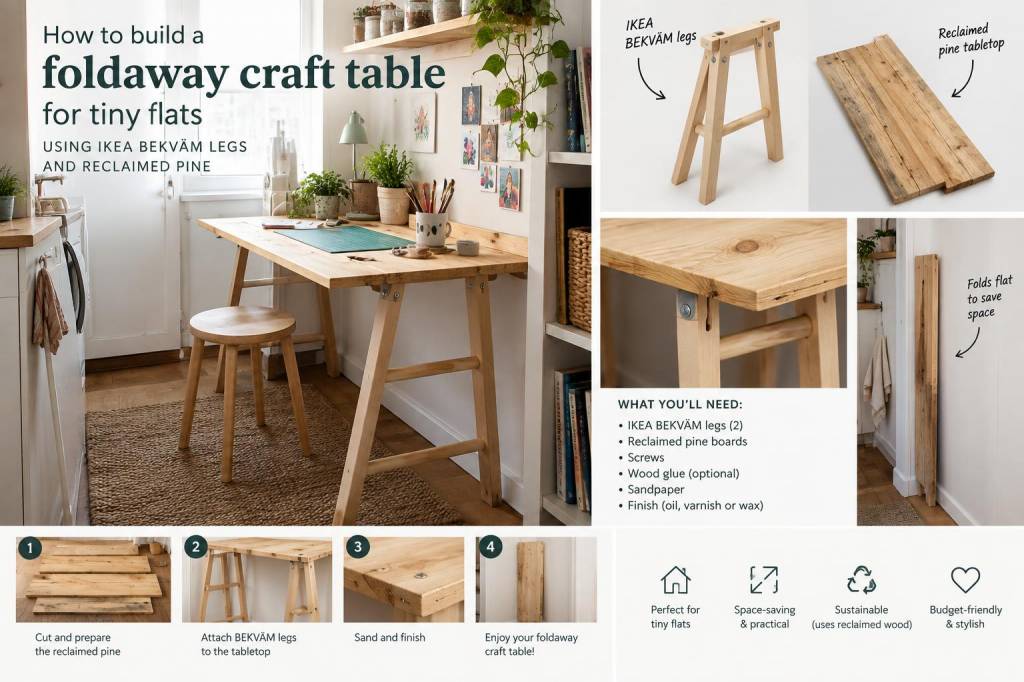
I live in a small flat where every square metre counts, so I build furniture that folds away, doubles up and looks warm rather than utilitarian. This foldaway craft table was born from that need: a sturdy, attractive workspace that disappears when I need the floor back. I used IKEA BEKVÄM legs for their compact, affordable design and paired them with reclaimed pine for a surface that’s both sustainable and full of character. Below I’ll walk you through materials, measurements, step-by-step assembly, finishing tips and troubleshooting — everything I tested at home before recommending it.
Why this design
My brief was simple: a table that can be mounted to a wall, folded down for sewing, paper crafts or a laptop, and stowed away without looking like a workshop. The BEKVÄM legs are perfect because they’re light, inexpensive and easy to attach, and reclaimed pine gives the top a lived-in warmth. This project is renter-friendly (minimal wall fixes), affordable, and entirely doable with basic tools.
What you’ll need
- Top: reclaimed pine board, planed and cut to size. I used 24–30 mm thickness for stability.
- Legs: 2 x IKEA BEKVÄM step-stool legs (you’ll use the side pieces as folding legs). You can also use the BEKVÄM bench legs if available.
- Hinges: 2 x continuous piano hinge or two 100–150 mm butt hinges (stainless or brass).
- Support bracket: either a folding shelf bracket or a simple removable wooden prop. I prefer heavy-duty folding shelf brackets (ideally rated 50–80 kg).
- Screws and wall fixings: wood screws for the top, wall anchors appropriate for your wall (masonry plugs, toggle bolts for plasterboard).
- Finish: beeswax, hard wax oil or a durable water-based varnish for a natural look.
- Tools: drill, countersink bit, screwdriver, tape measure, spirit level, clamp(s), sandpaper (120–220 grit), hand plane or orbital sander (optional), saw for trimming.
Dimensions and planning
Choose a width that fits your space — I made mine 120 cm wide and 45 cm deep which is roomy for sewing and crafting but doesn't dominate a small living area. Typical depths for a foldaway desk/table are 30–50 cm depending on use. Make sure the BEKVÄM legs, when folded, sit neatly beneath the top and don’t protrude.
| My build (example) | |
| Top size | 120 cm x 45 cm x 2.4 cm |
| Hinges | 1 x 120 cm piano hinge |
| Bracket | 2 x folding shelf brackets 250 mm |
| Wall fixings | 6 x heavy-duty wall anchors (3 per bracket) |
Preparing the reclaimed pine
I always start by flattening and smoothing my reclaimed boards. If you’ve sourced timber from an old pallet or salvaged fence boards, plane or sand both faces until they’re flat and even. Remove nails and patch any larger holes with wood filler. I sand progressively from 120 grit to 220 for a soft finish.
For stability, join narrower boards with biscuit joints or glue and clamp edges to make a wider top. If you prefer the raw look, keep the boards slightly separated and seal the surface to prevent dirt catching in gaps.
Fitting hinges and wall rail
- Decide where the table will live and mark a straight, level line on the wall for the hinge placement. The hinge sits flush to the back edge of the top so when folded up the top is vertical.
- Pre-drill holes in both the wall rail (if using a rail) and the top. If you’re using a piano hinge, screw it to the back edge of the plywood/pine first, then hold the table up and mark wall fixing points.
- Use appropriate wall fixings for your wall type — for plasterboard I like toggle bolts; for solid brick use masonry anchors.
Attaching the BEKVÄM legs
I removed the top step of the BEKVÄM and used the side pieces as folding legs. You can also adapt the whole stool, but using the leg sections keeps the footprint slim. Position the legs so they fold inwards and sit neatly under the table when folded.
- Pre-drill holes in the legs and the underside of the table. Use countersunk screws so heads are flush.
- If you want additional strength, glue the screw holes with a dab of wood glue before screwing in.
- Test-fold several times to ensure the legs retract fully and don’t foul the hinges or bracket.
Installing the folding brackets
I prefer two small folding shelf brackets rather than a single center support. Fix the brackets close to the edges but inside the leg positions so that when opened they lock solidly and transfer weight into the wall anchors.
- Screw the wall side of the bracket into the same row of wall fixings as your hinge for shared load distribution.
- Screw the table side of the bracket to the underside of the top. Use screws short enough not to go through the top.
- Open and close the bracket a few times to check smooth operation and alignment.
Finishing touches
Once the table is assembled and test-folded, finish the surface to protect it from glue, ink and tea rings. I like a hard wax oil (Osmo or Liberon) because it enhances the grain and creates a warm, low-sheen finish. Apply two thin coats, sanding very lightly between coats with 220 grit.
- Add small rubber bumpers to the underside corners so the folded top doesn’t mark the wall.
- Attach a small leather strap or magnetic catch to keep the legs folded in when you stow the table.
- If you want a clean edge, route a small chamfer around the top perimeter to avoid sharp corners (handy in small spaces).
Tips from my own tests
- I tested the table with a sewing machine, a laptop and a cutting mat — aim for at least 40–50 kg safe working load across the brackets and anchors.
- If your reclaimed wood is thinner than 24 mm, consider a plywood backing to stiffen the top and provide a solid fixing surface for the legs.
- For renters: use a French cleat instead of a piano hinge. The table will sit on the cleat and lift off for removal; it’s very secure when engaged and leaves only a single rail if you move out.
- Paint the underside (the part that faces the wall) in a light reflective colour to reduce visual bulk when folded up.
Troubleshooting common problems
- Wobbly table: Check that both brackets are fully locked and that wall anchors are tight. A sash clamp while tightening can help align parts.
- Legs don’t fold neatly: Trim a few millimetres off the top edge of the leg or reposition the hinge slightly forward/back to clear obstructions.
- Top sags in the middle: Add a thin steel strip or an additional bracket under the center for longer spans over 120 cm.
This foldaway craft table has been one of those small projects that changed how I use my flat — it gives me a dedicated creative surface without permanently sacrificing space. If you try it, I’d love to see photos or hear what variations you made — I often tweak mine seasonally, adding a roll of kraft paper under the top or changing the finish to match new textiles.