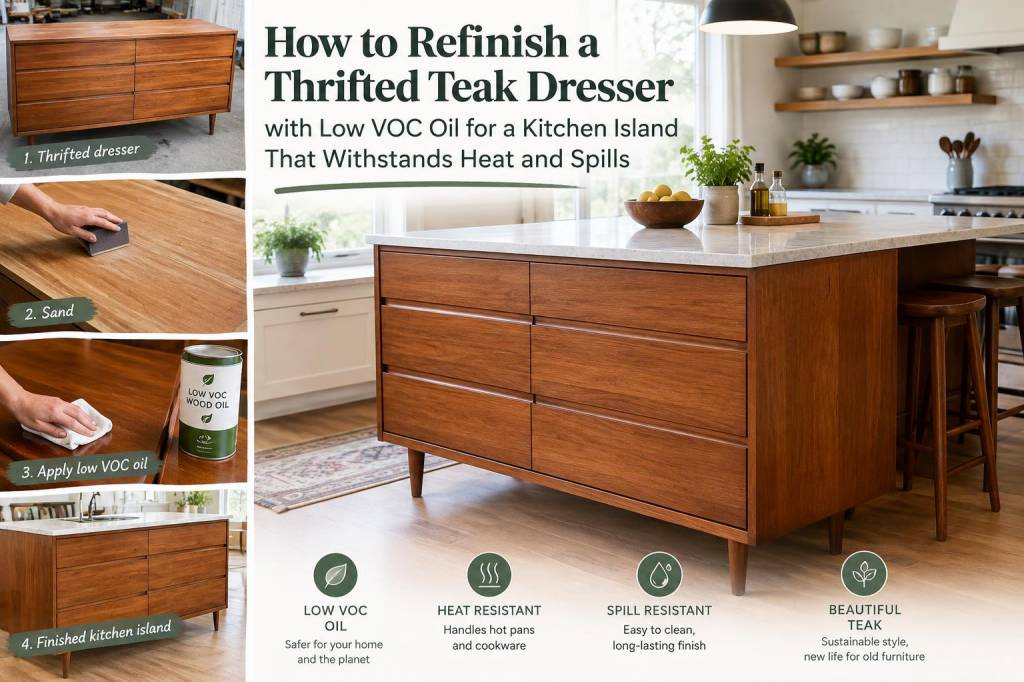
I found the teak dresser at a weekend market — a little scuffed, missing a knob, but with that warm, golden grain that feels like it was waiting for a second life. I wanted to turn it into a kitchen island: a compact prep surface with storage, a place to rest a hot pan and a coffee cup. The trick was to finish it so it could actually withstand heat and spills while keeping the finish natural, low-VOC, and repairable. In this post I’ll walk you through how I refinished a thrifted teak dresser using low-VOC hardwax oil, the choices I considered, and the practical steps I took to make a kitchen-friendly surface that still looks and feels like real wood.
Why teak and why a low-VOC oil?
Teak is one of my favourite reclaimed woods for kitchen furniture because it’s naturally oily and durable. That oil helps resist moisture, but a raw or lightly sanded teak top still needs protection if you’re going to put hot pans or acidic spills on it. I didn’t want a plastic-y polyurethane surface or a solvent-heavy varnish — I wanted something that felt tactile and could be maintained and repaired easily. That’s why I chose a hardwax oil with low VOCs: it soaks in like an oil, but also forms a thin, protective film that adds abrasion, water, and heat resistance.
Materials and tools I used
Here’s what I gathered before starting. You don’t need pro tools — just calm focus and good ventilation.
- Thrifted teak dresser (cleaned and empty)
- Soft cloths and tack cloths
- Orbital sander or sanding block (grits: 120, 180, 240)
- Hand scraper for stubborn finish
- Fine steel wool (0000) or abrasive pads
- Vacuum and a damp cloth
- Low-VOC hardwax oil — I used Osmo TopOil and also tried Rubio Monocoat on a sample
- Natural-bristle brush or lint-free pad and a short pile roller (foam can cause bubbles)
- Sandpaper for between coats (240–320)
- Heat-resistant pads and coasters for use
- Gloves, goggles, and ventilated workspace
Choosing the right low-VOC oil: quick comparison
| Product | Type | Heat Resistance | Notes |
|---|---|---|---|
| Osmo TopOil | Hardwax oil (blend) | Good — designed for worktops | Food-safe when cured, water- and heat-resistant; low VOC |
| Rubio Monocoat Oil Plus 2C | Oil with reactive hardener | Very good once cured | One coat coverage, durable, low VOC; slightly pricier |
| Pure tung or linseed oil | Natural oil | Moderate — less protection | Beautiful finish but needs frequent maintenance |
For my island I picked Osmo TopOil because it’s easy to apply, marketed for kitchen counters, and available in low-VOC formulations. Rubio Monocoat is excellent too if you want a one-coat system and very hard cure — either is a good eco-conscious choice compared with solvent-heavy varnishes.
Prep: cleaning and sanding the teak
Prep takes the longest but makes the biggest difference. I start by removing drawers, knobs, and any hardware. If there was a stubborn old varnish I used a hand scraper and then sanded. Here’s my routine:
- Wipe the surface to remove dust and grime. For grease, use a mild degreaser (diluted dish soap) and rinse with a damp cloth. Let dry fully.
- Sand with 120 grit to remove old finishes and level surface imperfections. Keep the sander moving with the grain — teak can show swirl marks if you’re not careful.
- Move to 180 grit to smooth scratches, then finish with 240 grit for a silky surface. The finer the final grit, the more even the oil look will be.
- Vacuum thoroughly and wipe with a tack cloth or a lint-free damp cloth to remove all sanding dust.
Applying the oil: technique and timing
I work in thin layers. Thick layers take longer to cure and can feel sticky, so less is more. Here’s the process I used:
- Work in good ventilation and a dust-free room. Wear gloves and safety glasses.
- Stir the oil gently — don’t shake (introduces bubbles).
- Apply the first thin coat with a lint-free cloth or short-nap roller, working with the grain. For Osmo TopOil, I applied about 2 small panels at a time so the product wouldn’t skin over.
- After 10–15 minutes, buff off excess with a clean cloth. The surface should look even but not glossy.
- Allow the first coat to dry for the manufacturer’s recommended time — usually 8–12 hours in warm, dry conditions.
- Lightly sand between coats with 240–320 grit or a fine abrasive pad to knock down any raised grain.
- Apply a second coat the same way. For a kitchen island I often do 2–3 coats total; Rubio Monocoat often only needs one coat plus a topcoat if desired.
I paid special attention to the dresser edges and corners — those see a lot of contact and need thorough coverage. For drawer interiors I used one light coat to keep them protected but still flexible.
Testing for heat and spills
Once fully cured (follow the product’s full cure time — often 7 days for maximum hardness), I perform small tests: place a kettle base, a warmed pan, and a lemon slice on the surface. Let them sit for a short period and then wipe up. With Osmo TopOil and Rubio Monocoat the finish resisted small spills and short contact with heat. That said, I still recommend using trivets for very hot pans — no wood finish is truly impervious to sustained high temperature.
Maintenance and how to repair marks
One of the big reasons I love hardwax oils is how easy they are to repair:
- For fresh spills, wipe immediately and rinse with a damp cloth.
- For dull spots, a light re-application of oil and buff is often enough.
- For deeper scratches, sand the area lightly and apply a spot coat of the same oil. It blends surprisingly well.
- Re-oil annually (or more often in heavy-use kitchens) on surfaces that see lots of wear.
Styling tips for your thrifted island
After finishing, I replaced the missing knob with a small brass peg and added a butcher-block style chopping board on top for heavy chopping — both as a design accent and to protect the teak top. I also installed felt pads on the feet to protect floors and added a magnetic knife strip to free up drawer space. Plants and woven baskets in the dresser’s cubbies balanced the warmth of the wood and kept the look lived-in and practical.
One final tip: always keep a small care kit with extra oil, a cloth, and sandpaper near your island. It makes it easy to do quick touch-ups and keeps the piece feeling looked after — which is the heart of a sustainable, long-lived home.