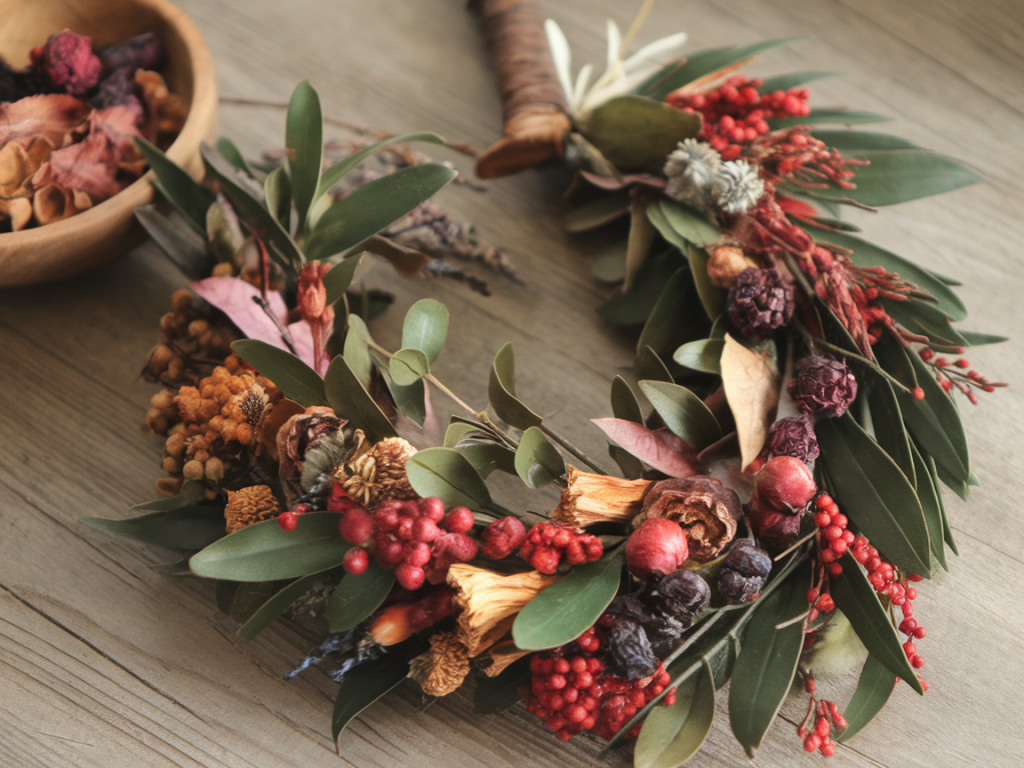
I make garlands throughout the year from whatever I can forage locally — eucalyptus in winter, willow in spring, rosemary and bay in summer, and grasses and seedheads in autumn. Over time I’ve learned which materials hold up, how to build a sturdy structure that doesn’t shed, and the little storage rituals that mean my garlands last season after season. Below I share my go-to materials, a step-by-step construction method that minimises shedding, and storage tricks that keep everything looking fresh.
Why some foraged garlands shed — and how to avoid it
Most garlands shed because the foliage is attached too loosely, the stems aren’t secured, or the plant material hasn’t been prepared properly (think fluffy seedheads or delicate petals). I’ve found three simple fixes control most of the mess:
Build on a strong base so foliage doesn’t pull away.Attach foliage in small, overlapped bundles tied tightly with florist wire.Choose or treat materials to remove loose bits before assembly.Materials I use (and why)
Below is a quick reference table of materials I rely on for year-round garlands.
| Material | Why I use it | Notes |
| Galvanised or annealed wire (2–3 mm) | Strong, flexible base that holds shape | Coated floral wire can be easier to hide |
| Jute twine or linen ribbon | To wrap the wire and hide attachments | Natural fibres look cohesive with foraged materials |
| Florist wire (28–24 gauge) | Secures small bundles without bulk | Green-coated wire blends in |
| Hot glue (optional) | Secures delicate items like seedheads | Use sparingly — can be visible if overused |
| Clear matte spray sealant | Reduces shedding and protects from damp | Test first on a scrap piece |
| Materials to forage: eucalyptus, bay, rosemary, willow, dried hydrangea, grasses, seedheads | Long-lasting, natural palette | Avoid overly fluffy blooms unless dried and sealed |
Preparing foraged materials (the step most people skip)
Preparation is key to a non-shedding garland. I always do this before any construction:
Trim stems at an angle and remove any loose leaves or fluff. For seedheads and grasses, I tap them gently over a bin to shed old debris.Dry fresh-cut pieces for a few days in a cool, airy spot if they’re likely to wilt — rosemary, bay and eucalyptus tend to dry nicely while retaining colour.For delicate petals (like hydrangea), I press or air-dry them first; once dry I give a light spray of clear matte sealant to lock fragments in place.Bundle similarly sized stems together so they tie cleanly without awkward overlaps.Construction: a reliable, low-shed method
This is the basic technique I use for a garland that will survive being handled, moved, and stored.
Make the base: Cut two lengths of 2–3 mm galvanised wire to your desired garland length. Twist them together gently to create a flexible but strong cord. For extra rigidity on longer garlands, twist three wires.Wrap the base (optional but tidy): Wrap jute twine around the wire base every 10–15 cm to create grip and a natural look. Tie off securely.Create small bundles: Group 3–6 stems together (depending on thickness). For sturdier materials like bay or eucalyptus, three stems is plenty. For grasses, use more to achieve volume.Attach bundles with florist wire: Place bundle on the base at a 30–45° angle, wrap florist wire tightly around stems and the base — make 3–4 wraps and finish with a small twist. Keep the wire tails tucked under the next bundle so you don’t see them.Layer as you go: Overlap bundles so each new bundle hides the wire of the last. This overlapping also secures loose tips and prevents gaps.Add fragile elements last: Dried seedheads, cones, or preserved eucalyptus can be wired separately and tucked into the top layer. If something is particularly delicate, a dab of hot glue at the base helps anchor it without crushing the piece.Finish the ends: Wrap the final 10 cm at both ends of the garland with jute and tie off. Form small loops with wire or twine for hanging.Tips to really minimise shedding
Use thin florist wire rather than string to fasten bundles — it grips stems better and won’t loosen over time.Remove any obviously flaky bits before attaching; if you leave them in, they’ll continue to shed later.For fluffy seeds or grasses, bake them at low heat (around 80–90°C) on a tray for 30–45 minutes — this can stabilise them. Test first, as some materials discolour.After finishing, give the whole garland a light mist of clear matte sealant or floral fixative from a distance (about 30 cm) to lock in small fragments. I prefer products labelled for dried flowers or crafts.Storage tricks that keep your garland intact
Proper storage makes the difference between a garland that lasts and one that ends up as a dusty heap.
Hang rather than lay flat: If space allows, hang your garland in a cool, dry cupboard or on a clothes rail. Hanging preserves shape and prevents crushing.Use breathable protection: Wrap in acid-free tissue paper and store in a cardboard box. Avoid plastic bags — they trap moisture and can cause mould or colour loss.Add cedar or lavender sachets: These help deter moths and add a gentle scent without chemical protectants.Label by season: I keep simple notes on what’s inside each box so I can rotate decorations easily and avoid unnecessary handling.Seasonal swaps and variations
I like to refresh small elements rather than rebuild the whole garland. In spring I swap in budding willow and fresh foraged herbs; in winter I add dried oranges or cinnamon sticks wired on for scent. If you’d like a more permanent, zero-shed option, consider mixing preserved eucalyptus (available from suppliers like Luxe Preserved or local floral shops) with your foraged pieces — preserved foliage keeps its form and sheds very little.
If you want a shopping list to get started, try: galvanised wire, florist wire, jute twine, clear matte spray, a small pair of pruning shears, and a stack of acid-free tissue for storage. From there, the rest can come from hedgerows and your garden — which is the part I love most: making something beautiful and sustainable from what’s already around me.