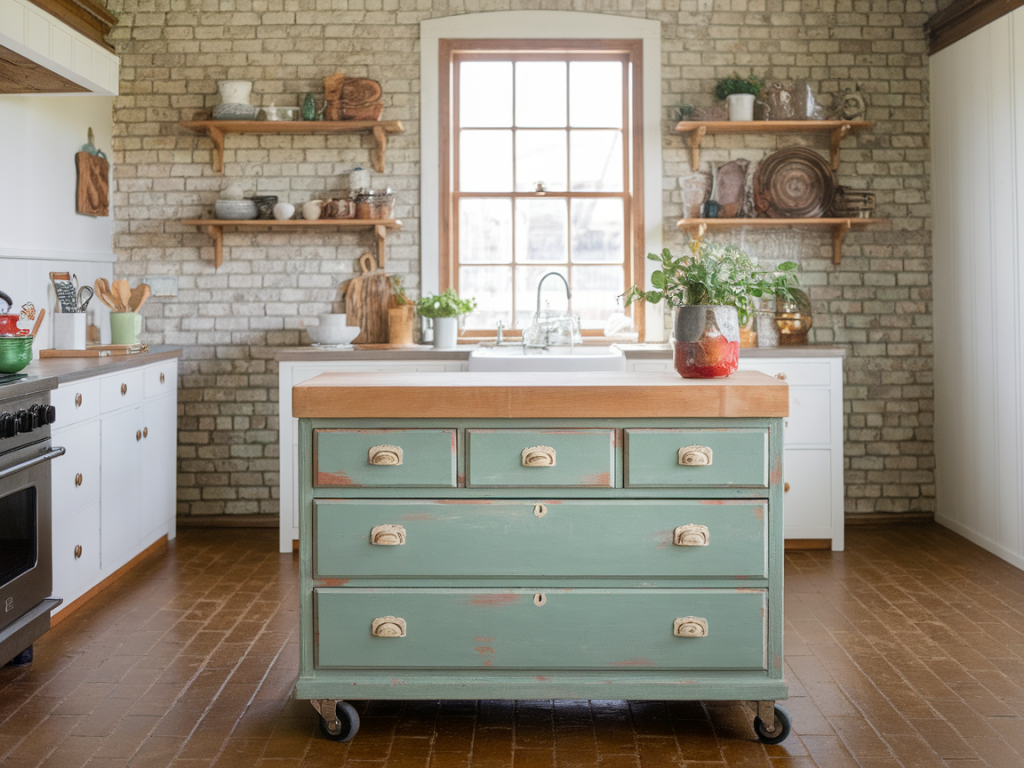
I found the pine dresser that became my kitchen island at a charity shop on a rainy Saturday — the kind of find that makes you want to hug a stranger and tell them their misfortune was my fortune. It was solid pine, a little scabby around the edges, drawers that still slid smoothly, and a size that screamed “island potential.” I knew I could turn it into something durable, useful, and beautiful using milk paint, new casters, and a butcher block top. If you’re tempted by a similar project, here’s exactly how I did it, what I learned, and tips to help you avoid the mistakes I made along the way.
Why I chose a thrifted pine dresser
Pine is affordable, widely available at thrift stores and auctions, and easy to work with. Buying secondhand is also a big part of my sustainability approach — fewer new resources used, and keeping furniture out of the waste stream. The dresser had good bones: strong carcass, dovetailed drawers, and a flat top I could remove to attach a custom butcher block surface. It was heavy enough to be sturdy as an island but light enough that I could move it with friends and a couple of furniture sliders.
Tools and materials
Here’s what I used. You don’t have to use exactly the same brands, but I’ve noted a few I like.
Preparing the dresser
Preparation is where the project wins or fails. I removed all drawers and hardware, cleaned the surfaces with a mild detergent and a de-waxing product because the dresser had once been waxed. If you skip this, milk paint will patch and flake unpredictably.
I sanded the top surface lightly (120 grit) to give the paint bite but left parts of the drawer fronts a little less sanded for character. Where the dresser had ugly holes or dents, I used a matching wood filler and sanded smooth once dry. If your dresser has veneer lifting, take extra care — you can glue and clamp or choose to paint over after stabilising the veneer with PVA glue.
Deciding on milk paint technique
I love milk paint for its matte, tactile finish and the way it ages. For this island I wanted a durable, slightly distressed look that felt lived-in, so I mixed Old Fashioned Milk Paint powder with water and added their bonding agent — this turns the paint into a stronger, single-component finish that adheres to sealed wood. If you want full chippy charm, skip the bonding agent and let the paint flake naturally over time.
Test your mix on a scrap piece first: milk paint can vary in opacity, so you may need two thin coats rather than one thick. I painted two coats with a mini-roller for the larger surfaces and a brush for corners. Let it dry fully between coats (usually a few hours).
Adding casters and strengthening the base
Turning a dresser into an island requires mobility and stability. I replaced the original feet with casters. I chose locking casters with a rubber tread to protect kitchen floors. Important: calculate the weight load — butcher block plus dresser plus things inside the drawers adds up. I chose casters rated for at least 80kg each.
To mount them, I removed the base trim and reinforced the inside corners with extra blocks of timber glued and screwed to the underside where the casters would attach. This prevents the screws pulling out over time. If you’re using threaded stem casters, make sure the hole sizes and nuts are appropriate; for plate-mounted casters, pre-drill and countersink to avoid splitting the wood.
Butcher block top — selection and attachment
I chose a pre-finished oak butcher block from IKEA for cost and convenience, but you can glue up your own from offcuts or buy a countertop-grade unit. If you use an unfinished top, sand it smooth and apply multiple coats of a food-safe oil or hardwax designed for worktops (Osmo TopOil or Odie’s Oil are popular choices).
To attach the top, I first positioned it dry to find the best overhang — I left about 30mm overhang at the front and sides for a countertop look, and smaller at the back to sit snug against the wall. I then used figure-eight or Z-clips (wood-to-wood clips) to allow the top to expand and contract with humidity. Avoid screwing rigidly through the top into the case unless you include floating fasteners; wood movement can cause splits and gaps.
Finishing the paint and hardware
Once the milk paint was dry, I gently distressed edges with 180 grit sandpaper and a sanding sponge, revealing a touch of the underlying wood for a soft, lived-in look. I sealed high-touch areas (drawer fronts and top edges) with a thin coat of water-based polyurethane or a clear hard wax for extra durability — choose a product compatible with milk paint and test first.
I replaced hardware with simple brass cup handles for a classic vibe. When selecting hardware, consider ergonomics for kitchen use — handles should be easy to grip with wet or flour-dusted hands.
Maintenance and care
Butcher block needs regular oiling to stay healthy — every few months give the top a refresh with mineral oil or a blend designed for food surfaces, more often in busy kitchens. For the painted surfaces, wipe with a damp cloth and avoid harsh detergents. If you used a wax finish, reapply thin coats yearly to maintain the sheen and protect the paint.
Common issues and how to avoid them
Budget and time
My total cost was modest because of the thrift buy: dresser £40, butcher block £60, paint and bonding agent £30, casters £40, hardware £20 — roughly £190 plus a few basic consumables. Time-wise, expect a relaxed weekend project: 2–3 days including drying times, or longer if you build a custom top or do more advanced joinery.
Final notes
This project is one of my favourites because it blends thrift, craft, and practicality. A thrifted pine dresser becomes a kitchen island that tells a story: secondhand origin, handmade care, and a finish that will only look better with use. If you try it, take photos and share them — I love seeing how other makers personalise the same basic idea. And if you’re unsure about a step, start small: you can always adjust distressing, colour, or top finish as you go.