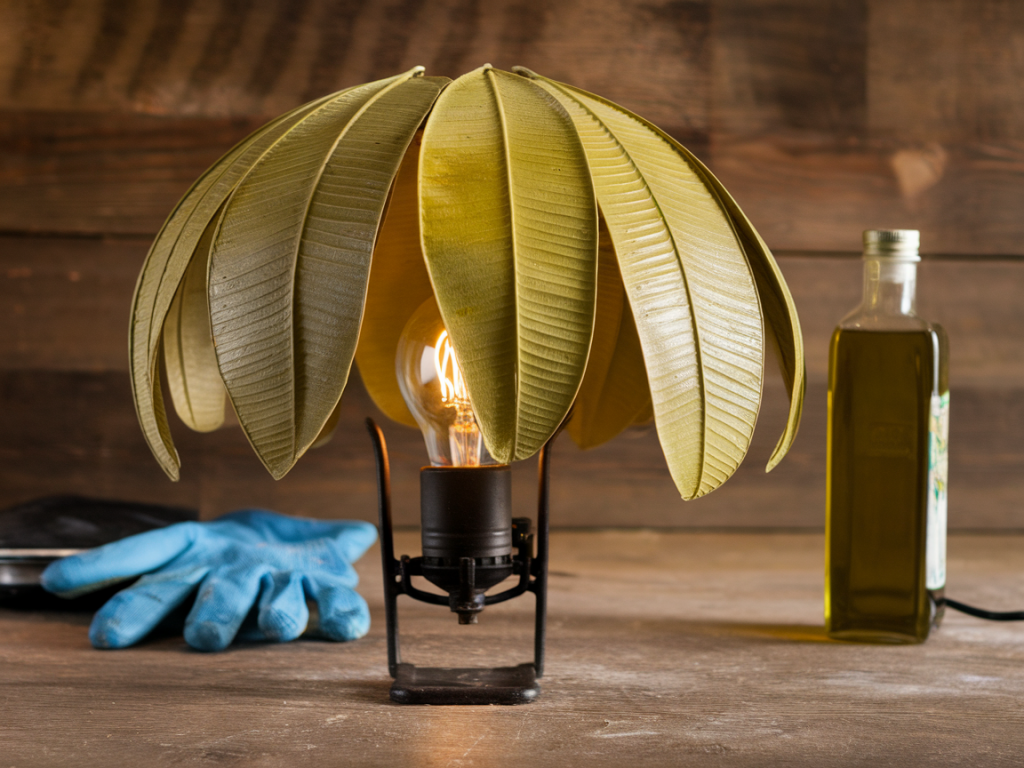
I love the tactile slow-work of making things for the home, and pressed leaves are one of my favourite ways to bring a little outdoors in. I’ve made several lampshades using leaves because they add delicate veining, soft translucency and a very human, seasonal quality to a room. People often ask whether you can finish those leaves with olive oil so they look richer but won’t yellow, and how to fit a lamp safely so the shade doesn’t turn into a fire risk. I’ve tested a few methods in my own flat and here’s the approach I use now — it keeps the leaves looking fresh, the shade durable and the lamp safe.
Materials and tools
Pressed leaves (well-dried; see pressing tips below)Plain paper or rice-paper lampshade (new or thrifted; clean)PVA glue or Mod Podge (matte is my go-to)Soft brush and small foam rollerClear water-based matte acrylic varnish or non-yellowing water-based lacquer sprayFood-grade mineral oil (optional alternative to olive oil)Beeswax (optional, for a subtle seal)Cloth or lint-free paper towelsScissors and craft knifeHeat-resistant LED bulb (see bulb table below)Basic lamp kit or existing lamp base with tested wiringHeatproof adhesive pads or metal shade ring (if needed for fitting)Note: I avoid using raw, culinary olive oil as the final finish on leafed paper. It can penetrate fibres and oxidize over time, causing darkening and rancid smells. If you want the warm sheen olive oil gives, use a tiny amount mixed into a stable, non-yellowing carrier — but the safest route is a dedicated non-yellowing varnish or a light mineral oil finish sealed under varnish.
Preparing and pressing leaves
I forage in local parks and hedgerows — be mindful of private land and protected species — and choose robust leaves with pretty veins (sycamore, plane, magnolia, eucalyptus work well). To press:
Place leaves between blotting paper or plain paper towels inside a heavy book, or use a flower press.Change the paper every couple of days for a week to avoid mould. Leaves ideally take 1–3 weeks depending on thickness.You want fully dry leaves that are flat and still slightly flexible; brittle leaves will crack when you glue them down.Attaching leaves to the lampshade
Test your layout first: arrange the leaves on the shade without glue to find a composition you like. I usually work in small clusters or a scattered, organic repeat.
Brush a thin layer of PVA or matte Mod Podge on the area of the shade where the leaf will sit.Gently place the leaf, pressing from centre to edges with a soft brush or lint-free cloth to remove air pockets.Coat the top of the leaf with another thin layer of the glue to seal it. Work in small areas so the glue doesn’t wrinkle the paper.Repeat until you’ve covered the shade. Let it dry completely (24 hours is safe).Olive oil finish that won’t yellow — realistic options
If you love the look of an oil finish but want to avoid yellowing, here are realistic, tested approaches I use.
Mineral oil base + seal: Food-grade mineral oil (available in pharmacies) gives the same warm, lived-in sheen as olive oil but doesn’t oxidize the same way. Apply a very thin coat with a cloth, wipe off excess, let it absorb for a few hours, then seal with 2 coats of a water-based matte acrylic varnish. The varnish prevents dust, moisture and further oxidation.Tiny olive oil + varnish (if you must): If you insist on olive oil for scent/colour, only use a very small amount thinned with mineral oil (say 10–20% olive oil to 80–90% mineral oil), apply sparingly, then immediately seal with acrylic varnish. Be aware this still carries a higher risk of darkening over time.Beeswax + oil topcoat: Melt a small amount of beeswax, mix with mineral oil to create a balm, rub on lightly, buff, then seal with varnish. The beeswax helps with tactile resistance and reduces the need for heavier oiling.Best non-yellow option: Skip oil altogether and apply a water-based satin or matte varnish — it preserves colour best and is the most stable long-term.My routine: I usually use a single, very light dab of mineral oil to warm the leaves, wipe off any excess, then spray two thin coats of a clear, non-yellowing water-based varnish (Testors Dullcote alternatives or a water-based polyurethane labelled “non-yellowing” work well). This gives the warm, saturated look I love without the long-term risk.
How to seal without losing translucency
Leaves look lovely when light passes through them. Heavy coats of varnish can flatten that effect. My tips:
Use thin, even coats rather than one heavy coat. Two light coats are better.Spray varnish is easiest for an even mist and keeps texture intact.If you’re using brush-on varnish, apply with a soft brush and work quickly along the leaf’s veins to avoid brushstrokes.Choosing the right bulb — safety first
The quickest way to make a beautiful shade unsafe is to pair it with the wrong bulb. Heat is the enemy. I always use LEDs with a low surface temperature and choose the correct lumen/watt equivalent for the room.
| Bulb type | Heat | Light quality | Notes |
| LED (recommended) | Low | Warm options available (2700–3000K) | Use low-profile LED suitable for enclosed fixtures if shade is enclosed |
| Halogen | High | Crisp light | Not recommended — high heat risk |
| Incandescent | High | Warm | Don’t use — too much heat |
Choose LED bulbs labelled for enclosed fixtures if your shade is close to the bulb. Use lower-lumen bulbs for small shades (about 400–800 lumens) and pick a warm colour temperature (2700K) so the leaves glow like candlelight.
Fitting and replacing the bulb safely
Always unplug the lamp or switch off at the wall before changing a bulb.Allow the bulb and shade to cool thoroughly — LEDs are cooler but still can be warm to the touch.Use the correct fitting. If the shade sits close to the bulb, fit a guard or diffuser to keep any stray heat away from leaf edges.Inspect wiring and sockets for wear. If in doubt, replace the lamp socket with a new, heat-rated lamp kit (easy to buy online and worth the safety).When you replace a bulb, avoid touching an LED with oily hands — grip the base, not the bulb surface.Testing and maintenance
After finishing the shade, test for heat: fit the shade and run the lamp for an hour under supervision. Check for warming of the shade and any smell. If it feels hot, switch to a lower-lumen LED or increase distance to the bulb.Dust gently with a soft brush. Reapply a thin protective spray coat every few years if needed.If you notice any darkening or stickiness, remove the shade from the lamp immediately and ventilate the room; consider stripping and resealing with a different finish.Making a pressed-leaf lampshade is a slow, rewarding project that fills a room with seasonal character. With the right finish (I favour mineral oil + water-based varnish or just a high-quality non-yellowing varnish) and a safe LED bulb, you can enjoy that soft, natural glow without worrying about yellowing or fire risk. If you’d like, I can share my favourite varnish brands available in the UK and the exact lamp kits I’ve used — just tell me whether you’re working with a paper or fabric shade and the size of your fitting.