Open kitchen shelves are one of those features I adore for their warmth and immediacy — they make a kitchen feel lived-in and personal. But they can also quickly become a display of chaos if you don’t have a plan. Over the years I’ve learned how to style shelves so they both showcase ceramics (those thrifted mugs and handmade bowls I can’t resist) and hide the clutter (tea bags, plastic containers, the electric whisk I use every week). Here are the practical, low-waste, and renter-friendly strategies I use at home.
Start with an honest edit
Before you even touch a cloth, pull everything off your shelves and do a quick edit. Ask yourself:
I’m ruthless about single-purpose items that rarely leave the back of a shelf. If something is purely decorative but you don’t love it, box it up for a month — if you don’t miss it, donate it. Editing creates breathing room, and emptiness is a powerful styling tool.
Divide function and display zones
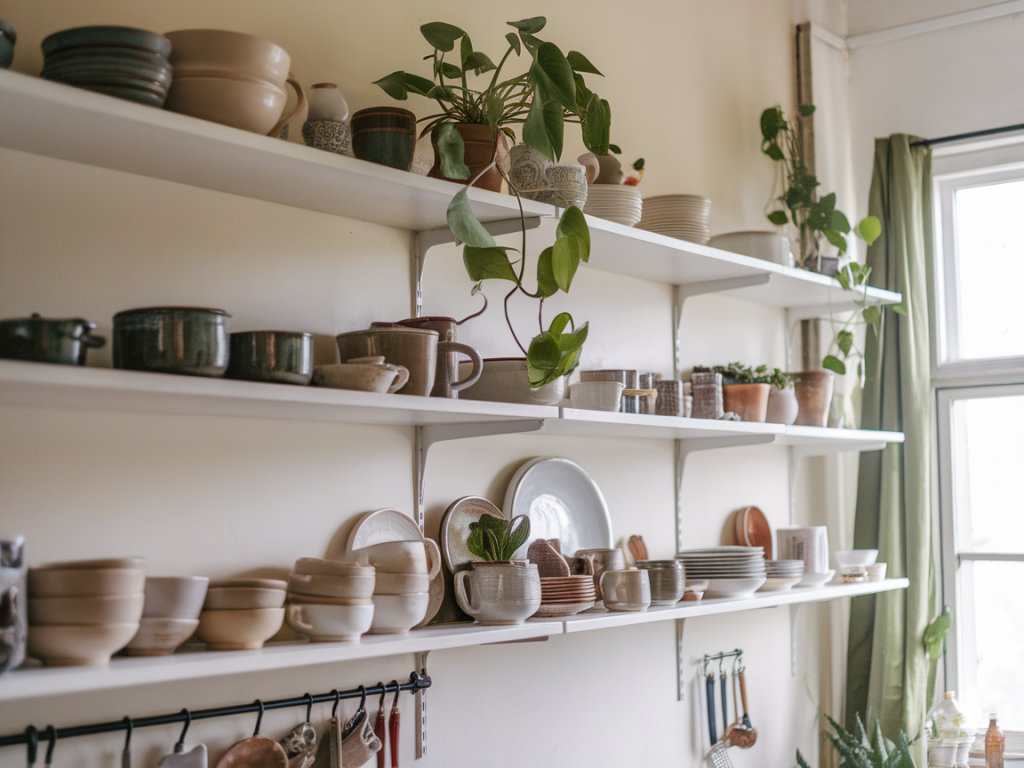
Think of each shelf as having a role: functional storage, everyday display, and occasional showcase. I reserve the lowest shelf for things I grab daily (mugs, plates), the middle shelf for pretty ceramics and bowls I use often, and the top shelf for items I love but use less (vintage jugs, seasonal pieces).
When you separate zones, your eye lands on the ceramics rather than the clutter.
Use containers that disguise and delight
Baskets, lidded boxes, and opaque jars are my go-to for hiding the messy bits. I prefer natural materials — seagrass baskets, linen boxes, or large stoneware crocks — because they feel cohesive with ceramics. Label discreetly with small wooden tags or kraft tape if you need to find things quickly.
Tip: thrifted bread boxes or vintage tins make brilliant hidden homes for bread, baking supplies, or anything you’d rather not see every day.
Group ceramics for impact
Grouping similar pieces creates a considered look. I aim for small clusters of 2–5 items rather than spreading singles across every shelf. Mix heights and shapes — a tall vase, a medium bowl, and a small cup read as an intentional vignette.
A useful rule is to repeat at least one colour or material across the shelves to create visual ties without being matchy-matchy.
Hide small clutter with clever, low-cost solutions
Small items — lids, chargers, sweetener packets — are the real shelf saboteurs. Here are some practical ways I hide them:
These are all quick, renter-friendly fixes that don’t require drilling or permanent changes.
Leave negative space
Resist the urge to fill every inch. Negative space gives your ceramics room to breathe and highlights individual pieces. I intentionally leave gaps between groups and sometimes remove a piece after styling to check the balance. If something feels too crowded, edit further — fewer, beloved objects always look better than many unconnected ones.
Play with levels and risers
Simple risers can change the dynamic of a shelf. I use small wooden blocks, thrifted cake stands, or even old books wrapped in kraft paper to raise items. This trick helps you see everything at a glance and avoids a flat, one-row look.
Camouflage unattractive items
For things you must keep on display but don’t find attractive (cleaning sprays, bulk stock), disguise them in matching glass bottles or reusable linen sacks. I decant dish soap into a simple amber pump bottle and transfer bulk grains to glass jars with hand-written labels — the resulting uniformity is calming and far more homey.
Introduce a living element
A plant or fresh herbs instantly humanise shelves. A trailing Pilea or a small rosemary pot adds life and scent. If light is limited, a low-light plant like a Sansevieria or a small bunch of dried flowers works beautifully and requires zero maintenance.
Seasonal swaps and maintenance
Once those shelves are styled, a light maintenance routine keeps them looking fresh. I do a 10–15 minute tidy weekly — straighten stacks, swap a seasonal ceramic, and wipe down dust. Every season I do a mini-refresh: add a autumnal earthenware jug, swap in a bright summer serving bowl, or bring out cosy neutral linens for winter.
Quick styling checklist
| Step | What to do |
| Edit | Remove everything and keep only what you love or use |
| Zone | Assign functional, display, and hidden roles to shelves |
| Contain | Use baskets, jars, and boxes to hide small clutter |
| Group | Create clusters of ceramics with varied heights and textures |
| Space | Leave negative space for balance |
| Maintain | Weekly 10–15 minute tidy and seasonal refreshes |
Styling open kitchen shelves is part organisation, part styling — and a bit of storytelling. When you combine practical storage with a few cherished ceramics, you end up with a kitchen that feels both useful and beautiful. Try one small change at a time: swap out a mismatched container for a woven basket, or create a trio of ceramics on the middle shelf. Little, intentional choices add up quickly.