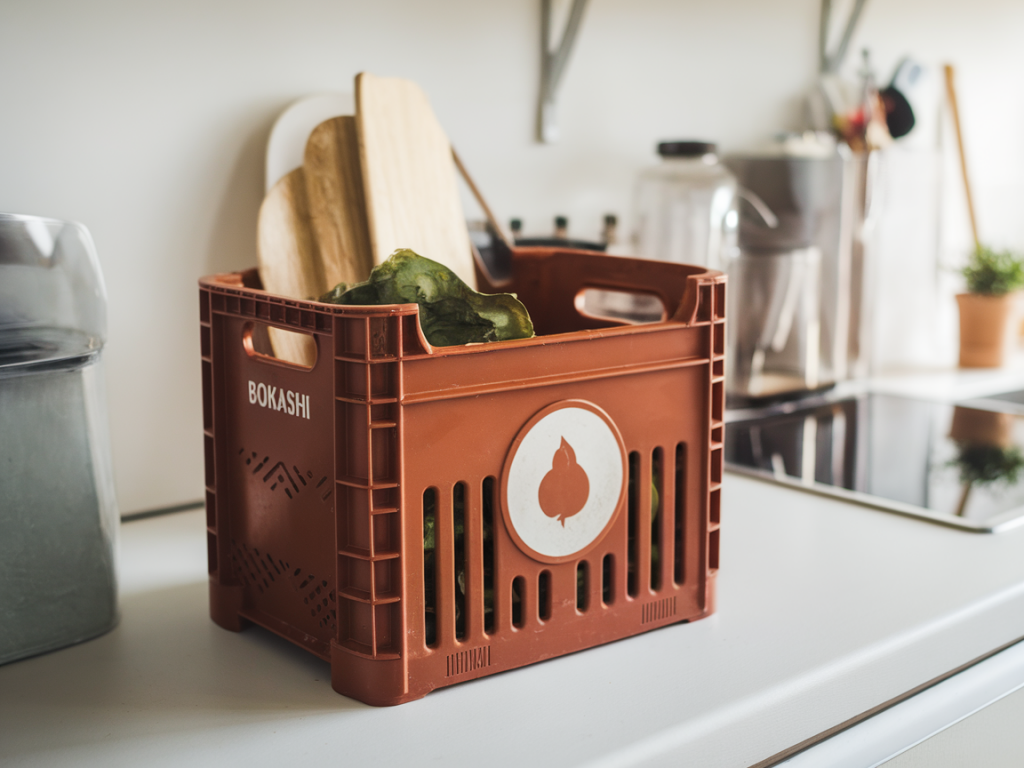
I live in a cosy studio and, like many of you, I struggled to compost in a tiny kitchen with minimal counter space and no garden. After trying small bokashi buckets that leaked or smelled and fiddly worm bins that needed space, I decided to make a compact bokashi system that fits neatly under my sink — using a sturdy milk crate as the frame. It’s cheap, tidy, and perfect for small households. Below I’ll walk you through how I built mine, what materials I used, how I maintain it, and answers to common questions you might have.
Why a milk crate bokashi bin?
A milk crate is strong, stackable, and ventilated — ideal for a compact bokashi setup. The crate allows me to keep the fermenting bucket elevated and drain liquid away, while the crate’s footprint fits a tiny kitchen cabinet or a narrow corner. I also like that the crate is easy to clean, light to move, and often free from charity shops or community swapping groups.
What you need (materials and tools)
Here’s a simple list of what I used. Most items are inexpensive and available from hardware stores, online marketplaces, or eco shops.
| Item | Purpose |
|---|---|
| Sturdy plastic bucket with tight lid (6–10 L) | Main fermenting container. Should be airtight and food-safe. |
| Drill with 6–8 mm bit | Make drainage holes in the bucket and crate if needed. |
| Milk crate | Frame to hold bucket and create space for drainage jug below. |
| Small collection jug (1–2 L, with lid) | To catch bokashi leachate (“bokashi tea”). |
| Coarse grate or old plastic chopping board | Lift the bucket’s base to allow liquids to drain freely. |
| Bokashi bran (or homemade EM mix) | Inoculant for fermenting kitchen scraps. |
| Caulk or silicone sealant | Optional — to seal any cracks or to fix a spigot if you add one. |
Step-by-step build
I made my bin in an evening. It’s simple and forgiving, so don’t worry if you’re not super handy.
- Pick the right bucket: Choose a food-safe bucket with a tight-sealing lid. I used a 10 L paint bucket I sourced from a recycling centre and thoroughly cleaned it. A purpose-made bokashi bucket with a spigot works well if you prefer — brands like Bokashi Living offer them, but they can be pricier.
- Drill drainage holes: In the base of your bucket, drill several small holes (6–8 mm). These let the liquid drain to the collection jug. If your bucket already has a spigot, you can skip drilling and sit the bucket directly on the crate.
- Prepare the milk crate: Place a coarse grate, pieces of pavers, or a repurposed plastic chopping board inside the crate, elevated about 6–8 cm from the bottom. This creates a space for the collection jug and keeps the bucket off pooled liquid.
- Position the collection jug: Place your 1–2 L jug under the elevated grate, centred to catch drips. I marked where the drip points were and positioned the jug accordingly.
- Seal if needed: If you’re using a drilled bucket and notice any cracks where liquid might leak out sideways, apply a thin bead of silicone sealant and let it cure. Make sure everything is dry and stable.
- Accessorise for tidiness: I added a small drawer-style tray on top of the crate (secured with Velcro) to hold a scoop of bokashi bran and a set of kitchen tongs so I don’t open the bucket more than necessary.
How I use it day-to-day
I chop or tear food scraps into small pieces (helps fermentation), then add them to the bucket in layers. After each layer I sprinkle a generous spoonful of bokashi bran and press down to remove air pockets. When the bucket is full, I compress the scraps, seal the lid tightly, and let it ferment for 10–14 days.
Each time I add scraps I open the lid briefly and close it again. The liquid that accumulates at the bottom — bokashi tea — drains into my small jug. I decant this weekly and dilute it 1:100 for use as a fertiliser on houseplants or pour it down the drain to help clear pipes (I always dilute well and avoid using undiluted strong bokashi tea directly on plants).
Maintenance and smells
My bin sits in a cupboard and rarely smells. Bokashi fermentation is anaerobic, so keeping the lid tight and compressing scraps reduces odours. If you ever detect a sharp sour or rotten smell, that’s usually a sign the lid wasn’t sealed or the mix had too much liquid — add more bran and press down, and the smell usually disappears.
- Cleaning: Wipe the bucket and crate with warm soapy water occasionally. I line my bucket with a layer of newspaper between fills to make removal easier — not strictly necessary but helpful.
- When fermentation is complete: The contents will smell pleasantly pickled and look compact. I bury mine in a neighbour’s community garden or mix it into a potted soil mix after a short composting period (or dig into a raised bed). If you’re a renter without a garden, you can keep a small wormery or bokashi digester at a friend’s garden or find a local council food waste drop-off.
Common questions people ask
How much space does this take? The assembly fits a typical milk crate footprint (about 40 x 30 cm) and stands roughly 40 cm tall with the bucket. It slides under many kitchen sinks or fits into a narrow cupboard.
Is it sanitary in a small flat? Yes — if you keep the lid sealed and empty bokashi tea regularly diluted. The process is anaerobic and discourages flies and pests. I’ve had it under my sink for two years with no issues.
What can I put in? All typical kitchen scraps: fruit and veg, coffee grounds, tea bags, cooked food, bread. Avoid large bones, too much oil, and dairy in excess — small amounts are okay. The bokashi process handles cooked food better than traditional composting, which is a huge plus for city dwellers.
How do I source bokashi bran? You can buy ready-made bokashi bran (look for brands like EM Bokashi or local suppliers) or make your own using wheat bran, molasses, and an effective microorganisms (EM) solution. I often buy a 1 kg bag every few months from an eco supplier or make small batches when I want to experiment.
What about pests? The sealed bucket and regular use of bran discourage pests. If flies are an issue, make sure scraps are well covered with bran and the lid is airtight. Keeping the bucket inside a cupboard also helps.
Variations and ideas
- You can add a small spigot to the bucket for easier draining — use a food-safe bulkhead fitting and silicone to seal. I prefer the drilled approach because it’s simpler and cheaper.
- Use stackable crates if you want additional storage for jars of bran or a small bag of dried sawdust to absorb occasional spills.
- If you have very limited indoor space, consider a flat planter-style bokashi bucket that sits horizontally in the crate and uses a shallow tray for liquid.
This system transformed how I manage scraps in a small space — it’s tidy, low-cost, and makes me feel less wasteful. If you try building one, I’d love to hear how you adapted it for your kitchen and any clever hacks you discover.